Cartoon Animator 5 - Getting Started with Free-form Deformation................
Cartoon Animator 5 - Started with Free-form Deformation
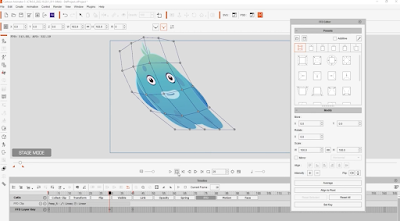
This flexible tool energy to your animations allowing you to fully utilize animation techniques such as squash and stretch in previous versions this tool was only available for props and sprites over now it can apply to any object or character in your seat let's look at the basic settings first using this cute little guy once he selected you can find an ft editor on the side panel and a wire free will cover your characters match at the top of the presets section will see a number of different presets for different scenarios which will explore a little bit later for now let's quickly hide the bone display and focus on the control points you can click and drag a single point or else multi select a number of different points and move them simultaneously for a different type of deformation.
you can hit reset selected to reset the selected points back to default and also reset all for all of the points on your character mesh you'll likely use these two buttons often when creating your ffd animations you can also use the one to six hot keys to switch between the presets so let's give that a shot if we apply some of the presets from the first set you can see that the control points form slightly different shapes according to the thumbnail these are quick ways to toggle between common shapes if you select additive you can combine presets or select the same preset twice in order to increase the strength in some cases you may want to modify the control point symmetrically like this case to do so simply select the mirror checkbox and then set the access from the drop down menu in some cases you may want to have more uniform spacing.
In this case you can see my editing might be a bit messy evenly spaced result and then using characters if we open up the timeline and create a number of flips at 10 frame intervals we can quickly and easily create a cool little walking motion in just a few seconds another useful feature is the intensity which will basically increase the strength of the current layout of your control points in this case if we press the plus button it will increase the strength of the deformation in that direction we encourage you to mess around with all the different presets available as they are incredibly easy to apply and can give you some really fun and bouncy animations in no time.
you can also use them as a starting point and then manually finetune the positions and timing of the control points to get the desired effect okay now that we have the basics down let's look at how we can use reform deformation to enhance an existing motion in this scenario applying a simple run loop to our shaggy friend here the basic run looks OK but we can definitely improve.


Post a Comment